Getting Started With Jekyll And GitHub Pages
This tutorial will guide you through creating a blog site with jekyll and GitHub pages just like this one. This site uses the minimal mistakes Jekyll theme and this guide will reflect the setup process specific for this theme. If you’re planning on using a different Jekyll theme the instructions may differ slightly, however, the overall process will be the same; but I would suggest consulting your themes documentation as well.
Prerequisites
In this guide I’m going to assume a working knowledge of git, GitHub, and basic command line navigation. If you’re not familiar with these skills here are some helpful guides.
What is Jekyll?
From the website:
Jekyll is a simple, extendable, static site generator. You give it text written in your favorite markup language and it churns through layouts to create a static website
Most imporantly, Jekyll is simple. I mean really simple. If you follow this guide you can get a great looking website running in minutes without having to type any code.
GitHub Pages?
GitHub pages is a static webpage hosting service published through GitHub directly from your repository. Being a static service, GitHub pages does not support server-side code from PHP, Python, Ruby, etc. This greatly simplifies the process for users (like me) who just want to push some content to the web. GitHub pages integrates seamlessly with Jekyll, which makes it the static site generator of choice for GitHub pages.
Lets build your website!
The easiest way to build your site (and the way I did it) is to fork the Minimal Mistakes remote theme starter and configure it from there. I’ll be performing this tutorial as a dummy user named ‘jekyll-tutorial’, so just replace any instance of ‘jekyll-tutorial’ with your GitHub username.
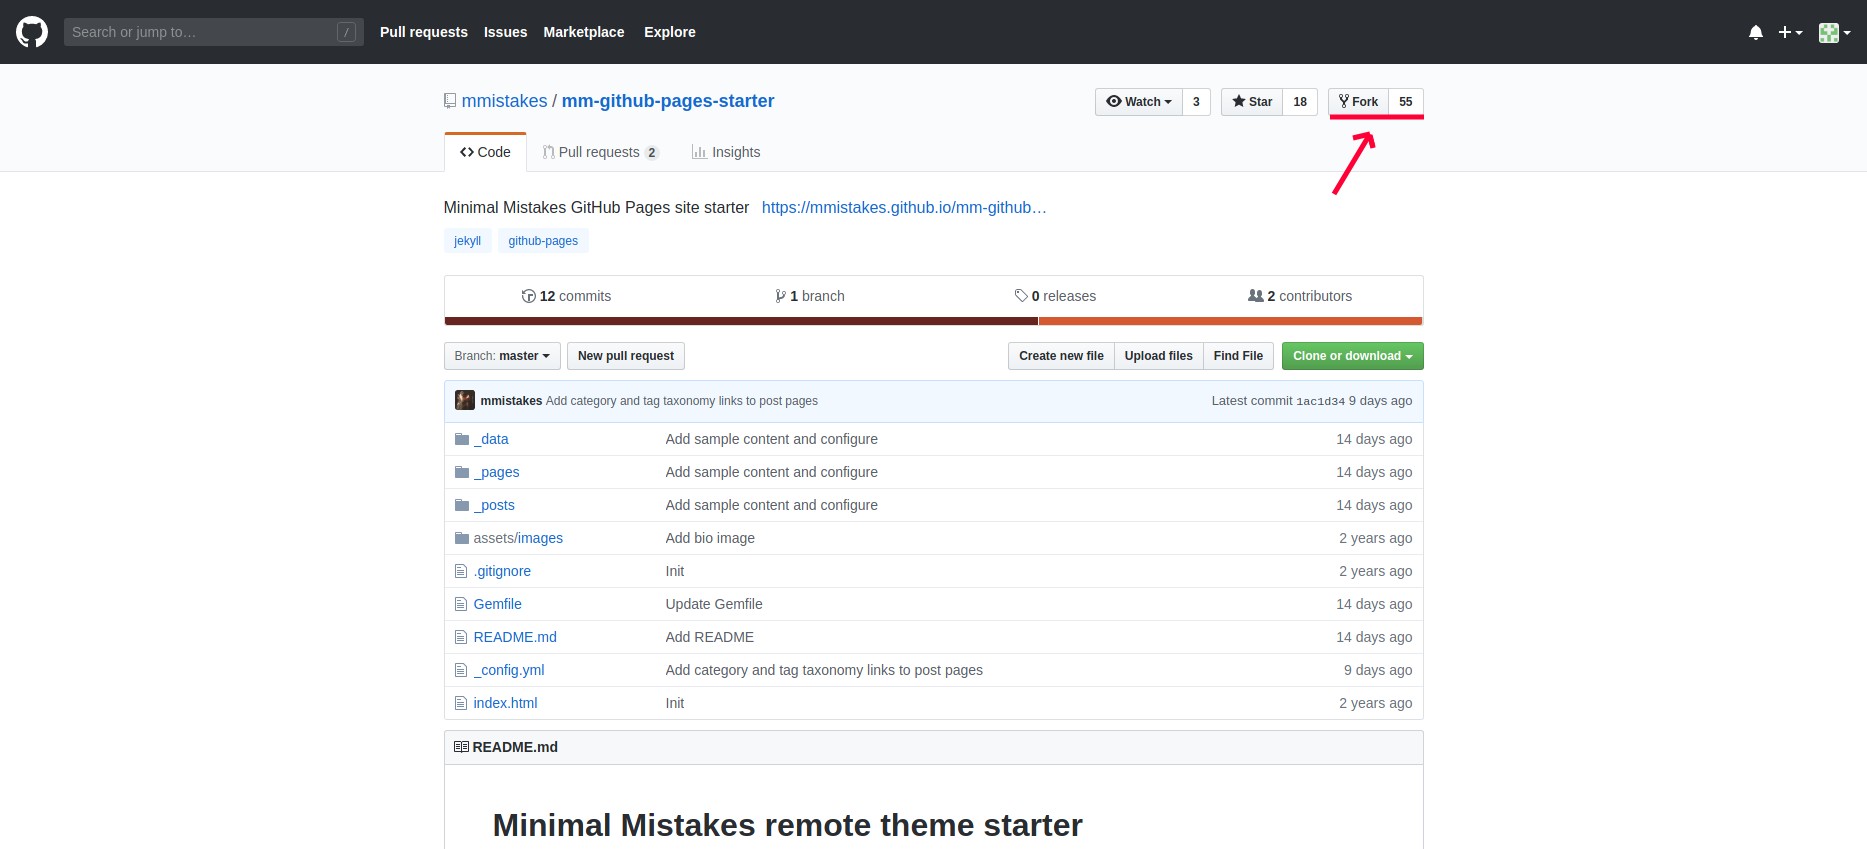
First, fork the repository onto your account.
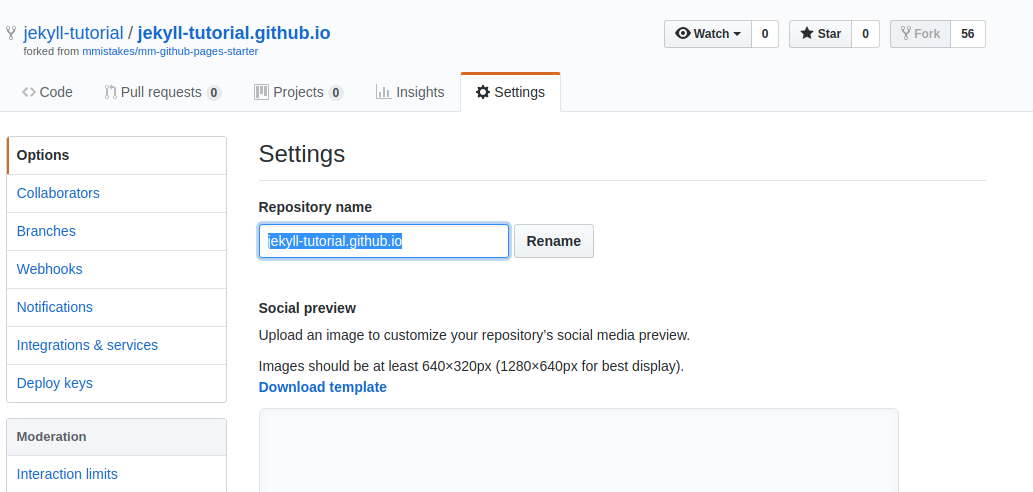
Then, from your forked repository settings page, change the name of the repo to <username>.github.io. In my example, I changed the repo name to ‘jekyll-tutorial.github.io’. This step is important, naming the repository in this format indicates to GitHub that this is a static site.
And that’s it! Your site will go live when GitHub builds it. Once GitHub builds the site it will look something like this.
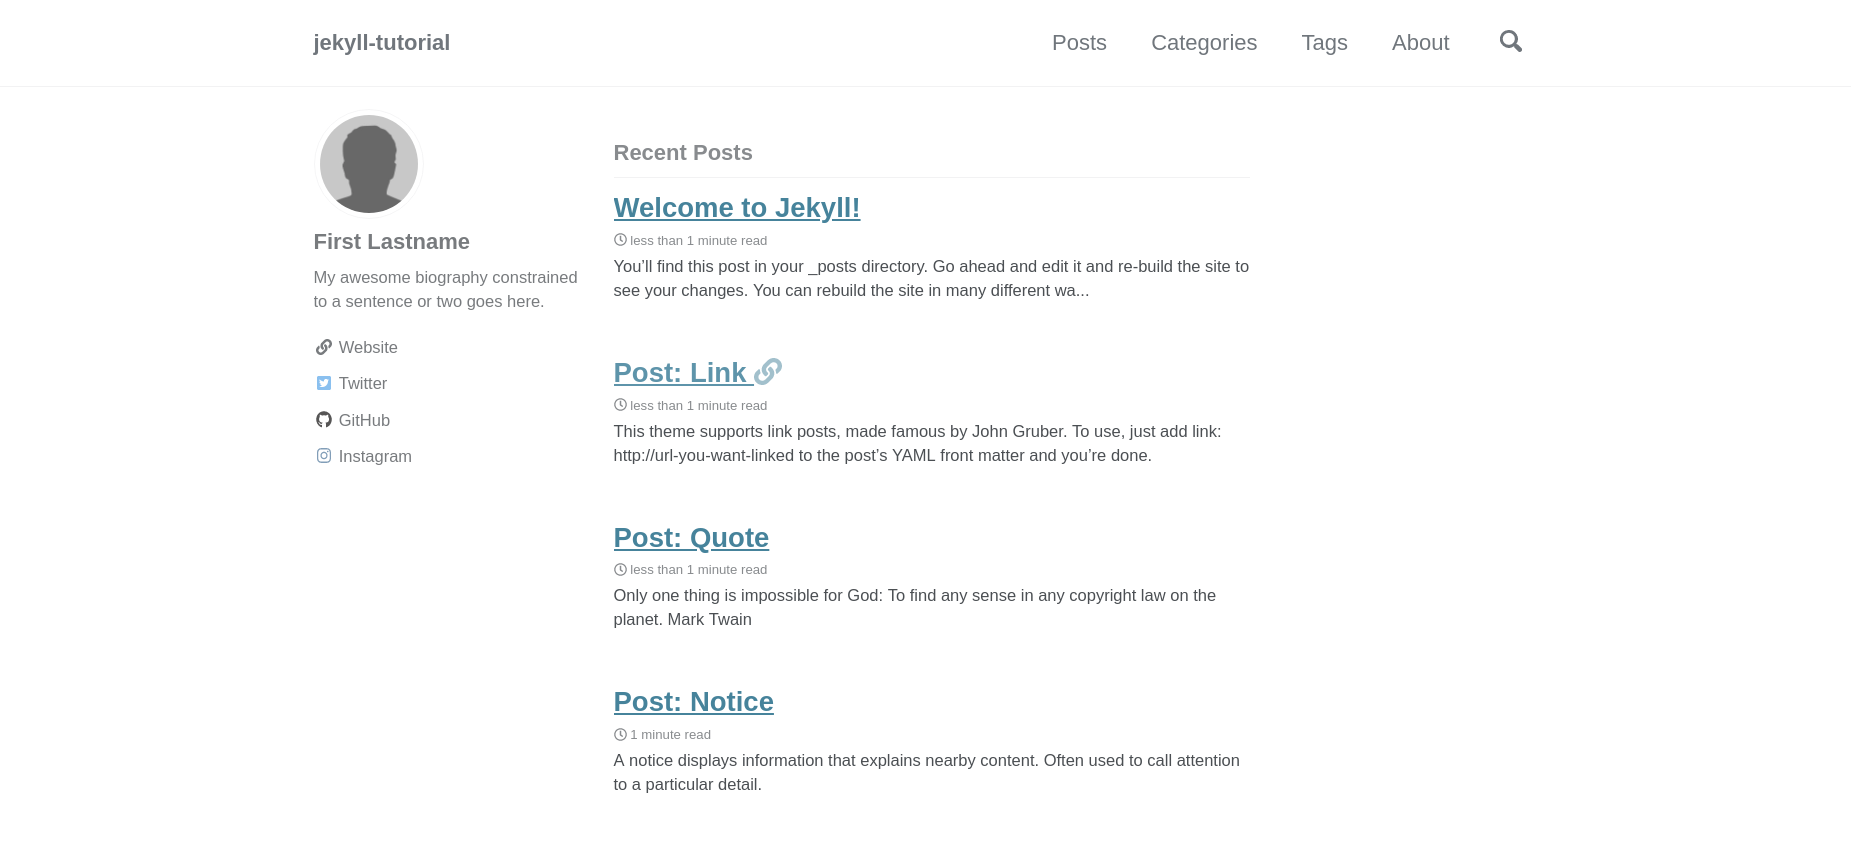
Of course our site is very boring right now. We need to edit the site configuration files to reflect our information.
Configuration
If you website didn’t display after the previous step, don’t fret, editing the _config.yml file and pushing the changes will trigger a build on GitHub. To do that we will first need to clone the repository onto our machine.
git clone https://github.com/jekyll-tutorial/jekyll-tutorial.github.io.git
Navigate into the directory.
cd jekyll-tutorial.github.io
And open the _config.yml file with your favorite text editor. The first thing you will notice is that there are a lot of fields that we can configure. I will only highlight a few configuration options in this tutorial, but a detailed overview of the configuration can be found with the Minimal Mistakes documentation here.
First let’s name our site, add a profile image, and fill out the author information. Here are the fields I changed first.
title: jekyll-tutorial
email: jekyll-tutorial@domain.com
description: "Super awesome description"
url: https://jekyll-tutorial.github.io
minimal_mistakes_skin: dark

author:
  name   : "jekyll-tutorial"
  avatar : "https://avatars1.githubusercontent.com/u/50220475?s=460&v=4"
  bio    : "Whoah, someone is reading this?"
  links:
    - label: "Website"
      icon: "fas fa-fw fa-link"
      url: "https://jekyll-tutorial.github.io"
    - label: "GitHub"
      icon: "fab fa-fw fa-github"
      url: "https://github.com/jekyll-tutorial"
There a couple of things to note here. First I changed the Minimal Mistakes skin to Dark. Minimal Mistakes supports a few different colorschemes which can be found in the docs. I also linked my avatar image to my GitHub avatar URL. You can also just add a .png file into your repo and link its relative path. Here is an example where an image is stored in the assets/images/ folder:
avatar: /assets/images/awesome_profile.png
Also, it is important to note that these configuration settings apply to the Minimal Mistakes theme only, and may or may not exist in other Jekyll themes.
Great, now that we have some basic settings added lets commit and push our changes to trigger a build.
git add .
git commit -m "Updated _config.yml"
git push
After a few seconds (hopefully) we should be able to navigate to our site and see the changes.
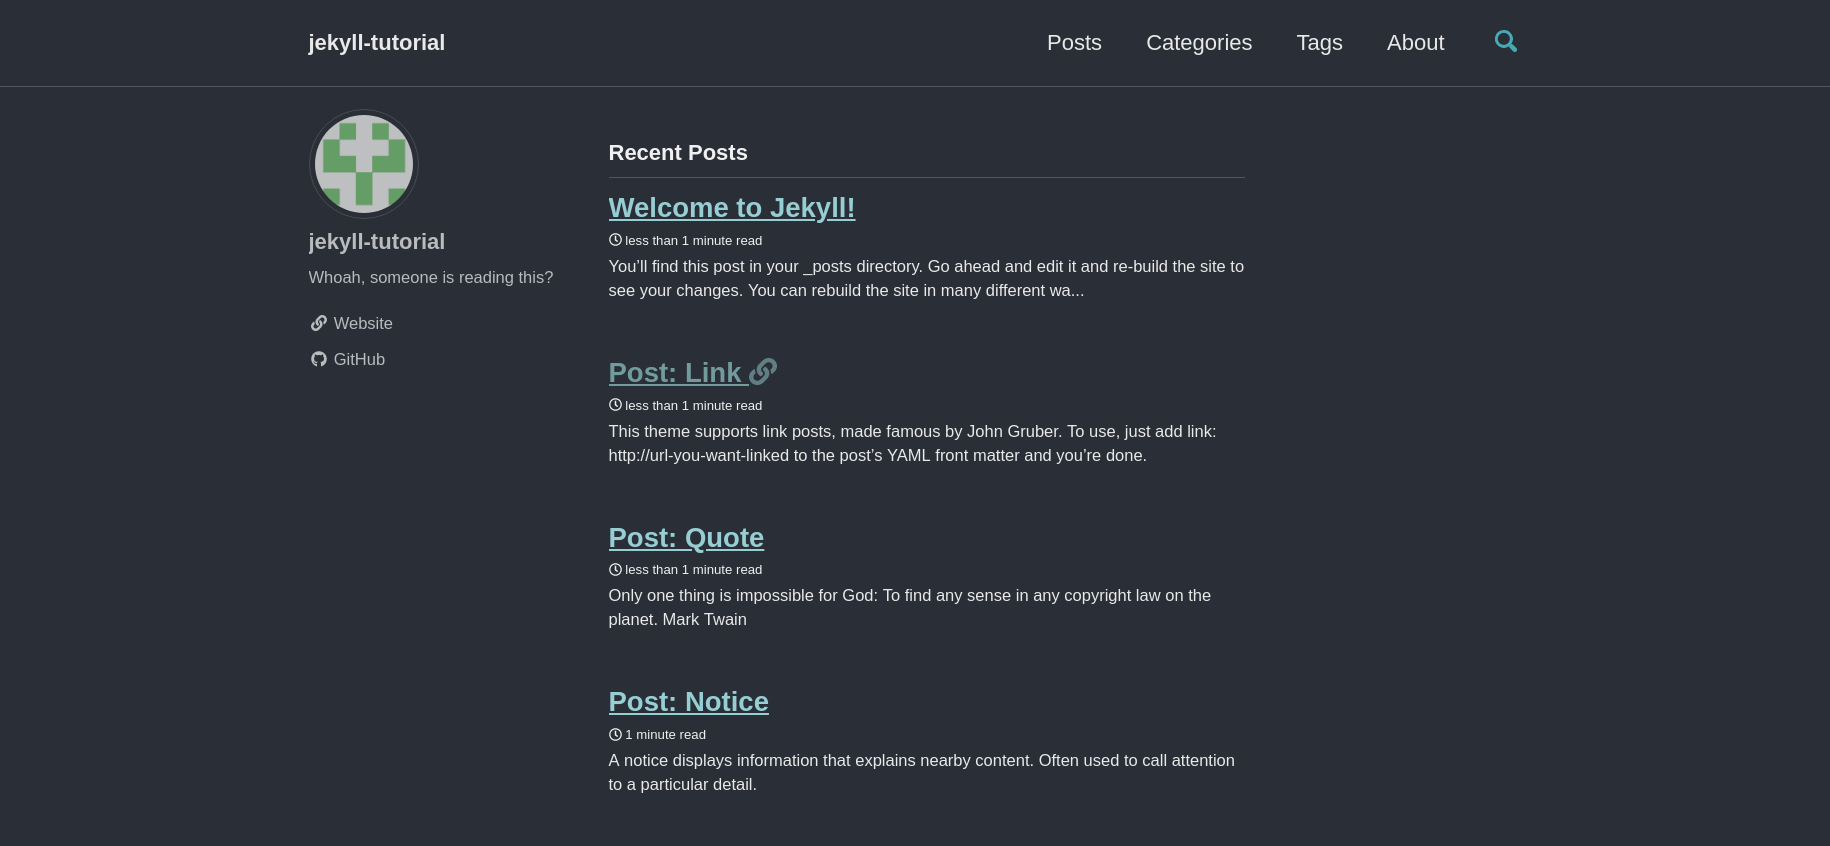
Our site is looking good! All that’s left is to configure it further and add some content.
Further Configuration and Adding Content
All posts we want the site to render will need to go into the _posts folder and must be named in the following format: YYYY-MM-DD-Title-of-post.md. Luckily, the starter repo comes with a bunch of example posts, so I won’t cover how to create blog posts in this tutorial. Just follow the format of the provided posts and you’ll be just fine.
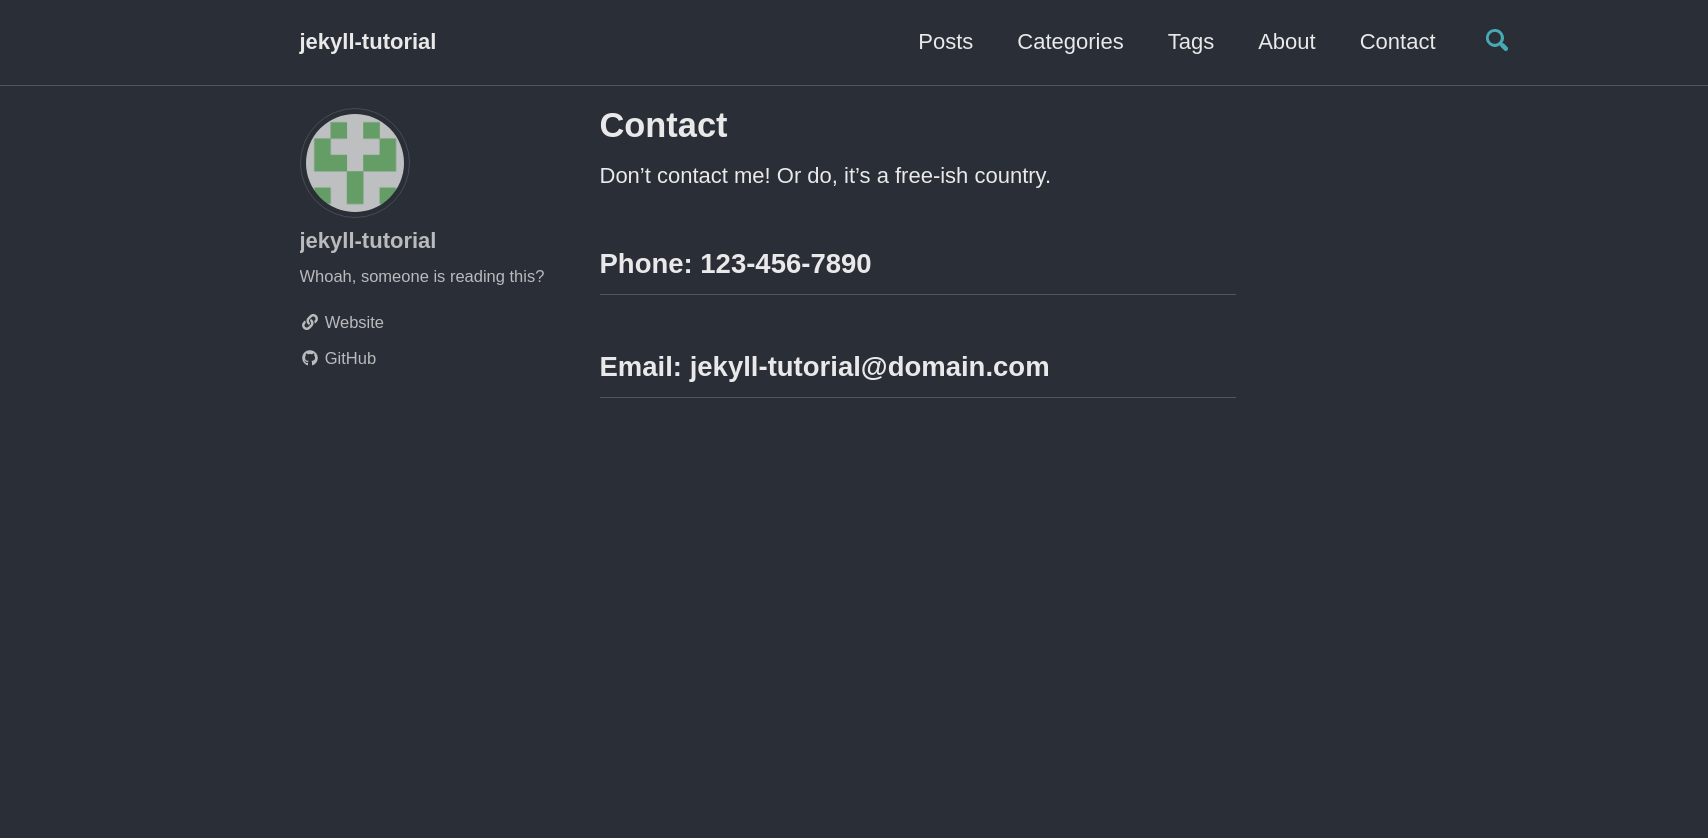
You’ll also notice that the navigation bar contains four links to Posts, Categories, Tags, and an About section. You can modify the content of these pages in the _pages folder. If you want to modify the nav bar itself, you can do so with the navigation.yml file in the _data folder. For example, lets add a basic Contact page.
First, create a contact page.
touch _pages/contact.md
Then, open the contact.md file and add the following lines.
---
permalink: /contact/
title: "Contact"
---
Don't contact me! Or do, it's a free-ish country.

## Phone: 123-456-7890
## Email: jekyll-tutorial@domain.com
The text within the triple dash segment is called the yaml-front matter. Inside the front-matter we can specify how the page is laid out, add tags, and most importantly give our page an address with the permalink field.
Next we need to add the contact page to the navbar with its permalink address. Open the navigation.yml file and add the following to the main: segment
    - title: "Contact"
      url: /contact/ # URL must match the permalink in the contact.md file
Now, commit and push our changes to see our new contact page.
Finishing Up
There is so much more that the Minimal Mistakes theme, Jekyll, and Github pages can do that is out of the scope of this tutorial. If you want to continue configuring and tuning your site just check out the official documentation! Also, the full repository from this tutorial can be found here
If you liked this guide, or have suggestions, please like, comment, and share! Also, make sure you follow me on twitter, @dev_null42, to keep up to date my with my latest posts and activities.


Leave a comment